
Welcome to my blog on dimensional paper letters!
If you’re looking for a unique and creative way to add some style to your crafting projects, then 12×12 Cardstock dimensional paper letters may be just what you need. Dimensional paper letters are a fun and creative way to add a 3-dimensional element to your projects, whether it be scrapbooking, card making, home décor, or any other craft you can think of!
The great thing about dimensional paper letters is that they come in a variety of shapes and sizes, from small and intricate letters to large and bold letters. You can choose from a variety of colours, textures, and finishes, making it easy to find the perfect letters for your project.
When using dimensional paper letters for crafting, there are a few tips to keep in mind. First, make sure that your project surface is clean and free of dust and dirt. This will help you get the best results and ensure that your letters stick securely. Second, use strong adhesives to ensure that your letters stay put. Finally, take your time and be careful when applying the letters to your project surface, as they can be delicate.
I hope this blog has given you a better understanding of dimensional paper letters and how to use them in your craft projects. With a little bit of creativity and patience, you can create some truly stunning and unique projects using these versatile letters. So go ahead and start crafting with dimensional paper letters today!
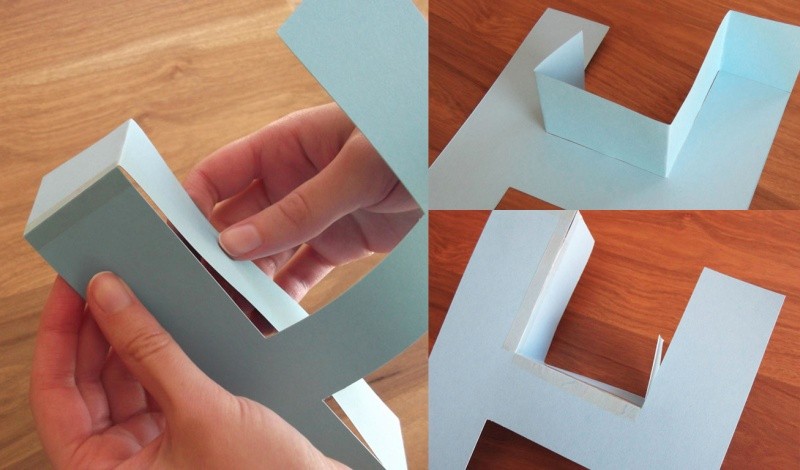
Are you looking to spruce up your home or office with some creative wall decor? If so, then you’re in luck because dimensional paper letters are an easy and fun way to do just that! Making dimensional paper letters from scratch is a great DIY project that doesn’t require a lot of money or time. Plus, it’s an excellent way to practice your paper crafting skills and create something unique that you can be proud of. Ready to get started? Here’s how to make dimensional paper letters step by step.
Step 1: Gather Your Supplies
For this project, you’ll need a few basic supplies such as paper, scissors, a glue stick, and a ruler. You can also use cardstock or foam board if you’d like to make more durable letters.
Step 2: Cut Your Paper
Start by cutting your cardstock paper into the desired size and shape for your letters. You can use a template or freehand draw the letters if you feel comfortable. Make sure to cut out an extra piece for the back of each letter to give them extra stability.
Step 3: Glue the Pieces Together
Once you’ve cut out all of your pieces, use a glue stick to attach the front and back pieces of each letter. Make sure to press firmly so that the letters are securely attached.
Step 4: Assemble the Letters
Now it’s time to assemble the letters! Start by gluing the front and back pieces of each letter together. Then, use a ruler to ensure that all edges are lined up properly.
Step 5: Add Decorations
Finally, add some embellishments to give your letters a personal touch. You can use ribbon, glitter, or other craft supplies to make your letters look even more special.
And that’s it! Making dimensional paper letters is a great way to add some custom decor to your home or office. Now that you know how to make them, give this easy DIY project a try today and enjoy the unique results!